- Subscribe to RSS Feed
- Mark Topic as New
- Mark Topic as Read
- Float this Topic for Current User
- Bookmark
- Subscribe
- Printer Friendly Page
- Mark as New
- Bookmark
- Subscribe
- Mute
- Subscribe to RSS Feed
- Permalink
- Report Inappropriate Content
Disclaimer:
-Do it at your own risk. I do not take any responsiblity for your actions.
-I do not take credit for discovering the USB port. I heard it for the first time from jimmyzshack (thank you) from another post.
-This will void your warranty.
-Be prepared to lose a camera (to me the work is absolutely safe).
-Someone (TomMac) has said it may burn the port out.
-I wouldn't use it outdoors unless you silicone the opening for the USB cord.
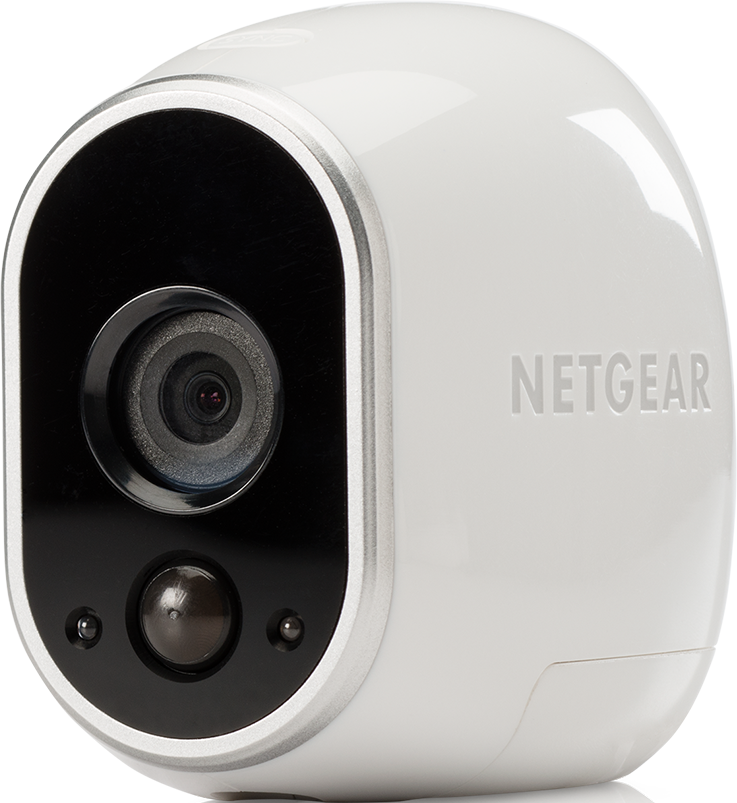
I need to convert 4 cameras for interior use. All other maker security cams run on a 5V USB type charger. Including ones that pan, zoom, tilt so I'm chancing that this will work. I am currently using the dice-sized iPhone charger. I wonder if it is better to use the larger iPad charger or something that outputs 10w 2.1 amps? I have no electrical background, but I am guessing that the unit uses 4 batteries for power reserve capacity and there is some voltage regulator to bring it down to 5v. Just a guess. The IR also work with this mod.
Separate the battery cover by gently prying it off from one side. The slide lock may fly out. I didn't bother replacing it since the lock is redundant and I'm not using batteries.
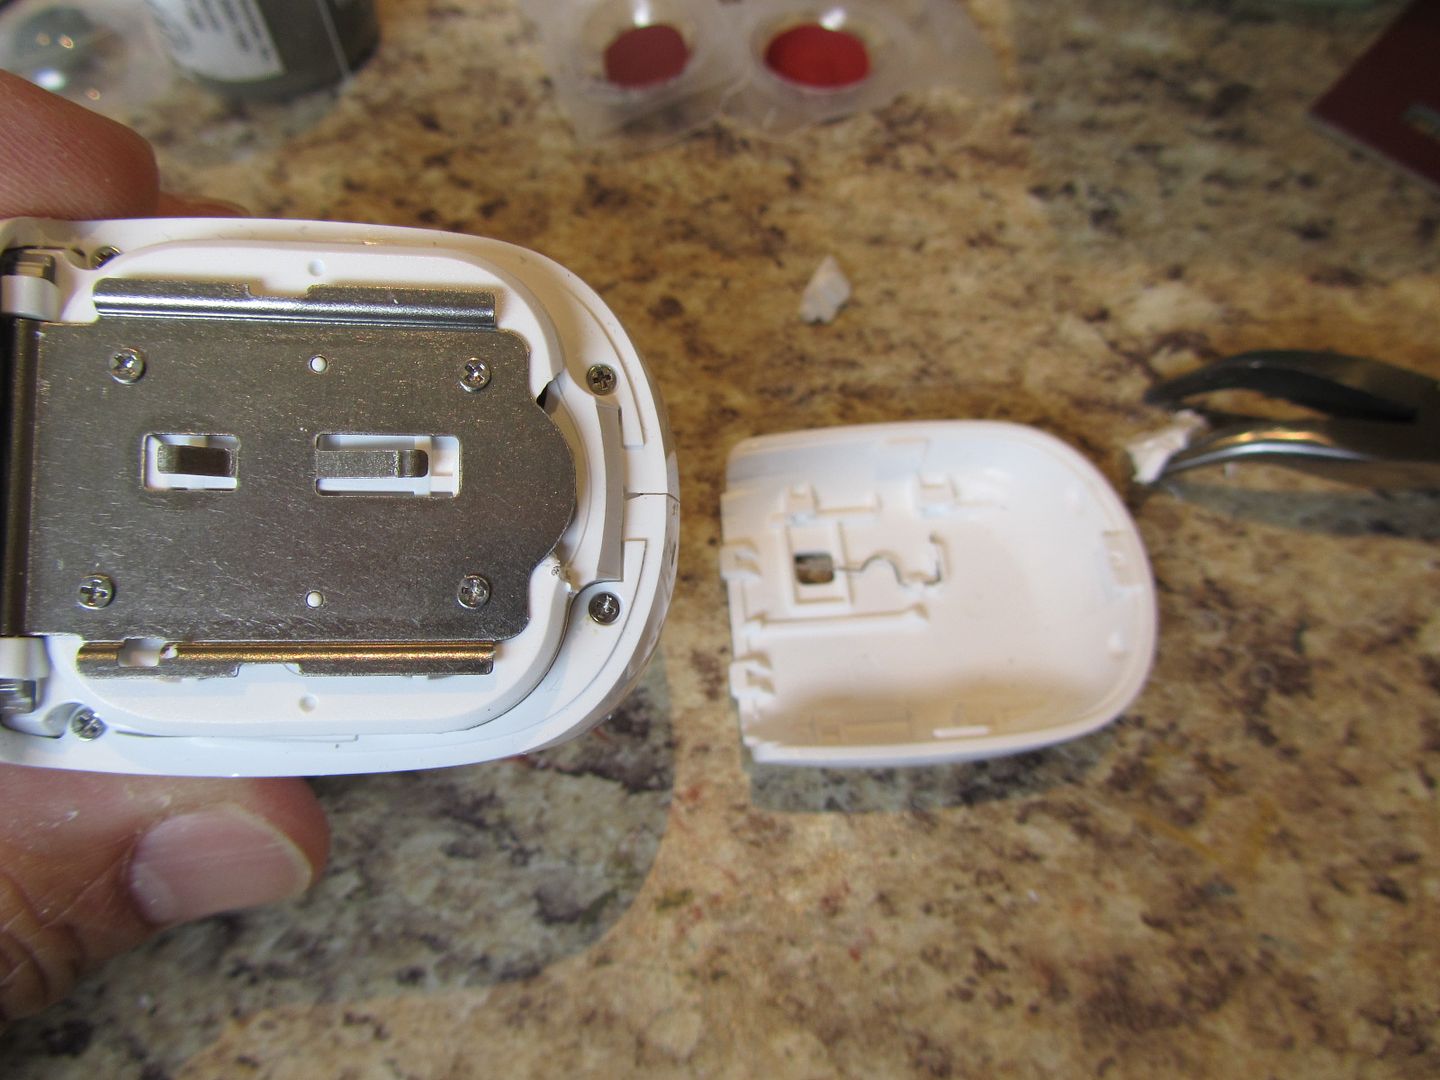
Grind the plastic lid
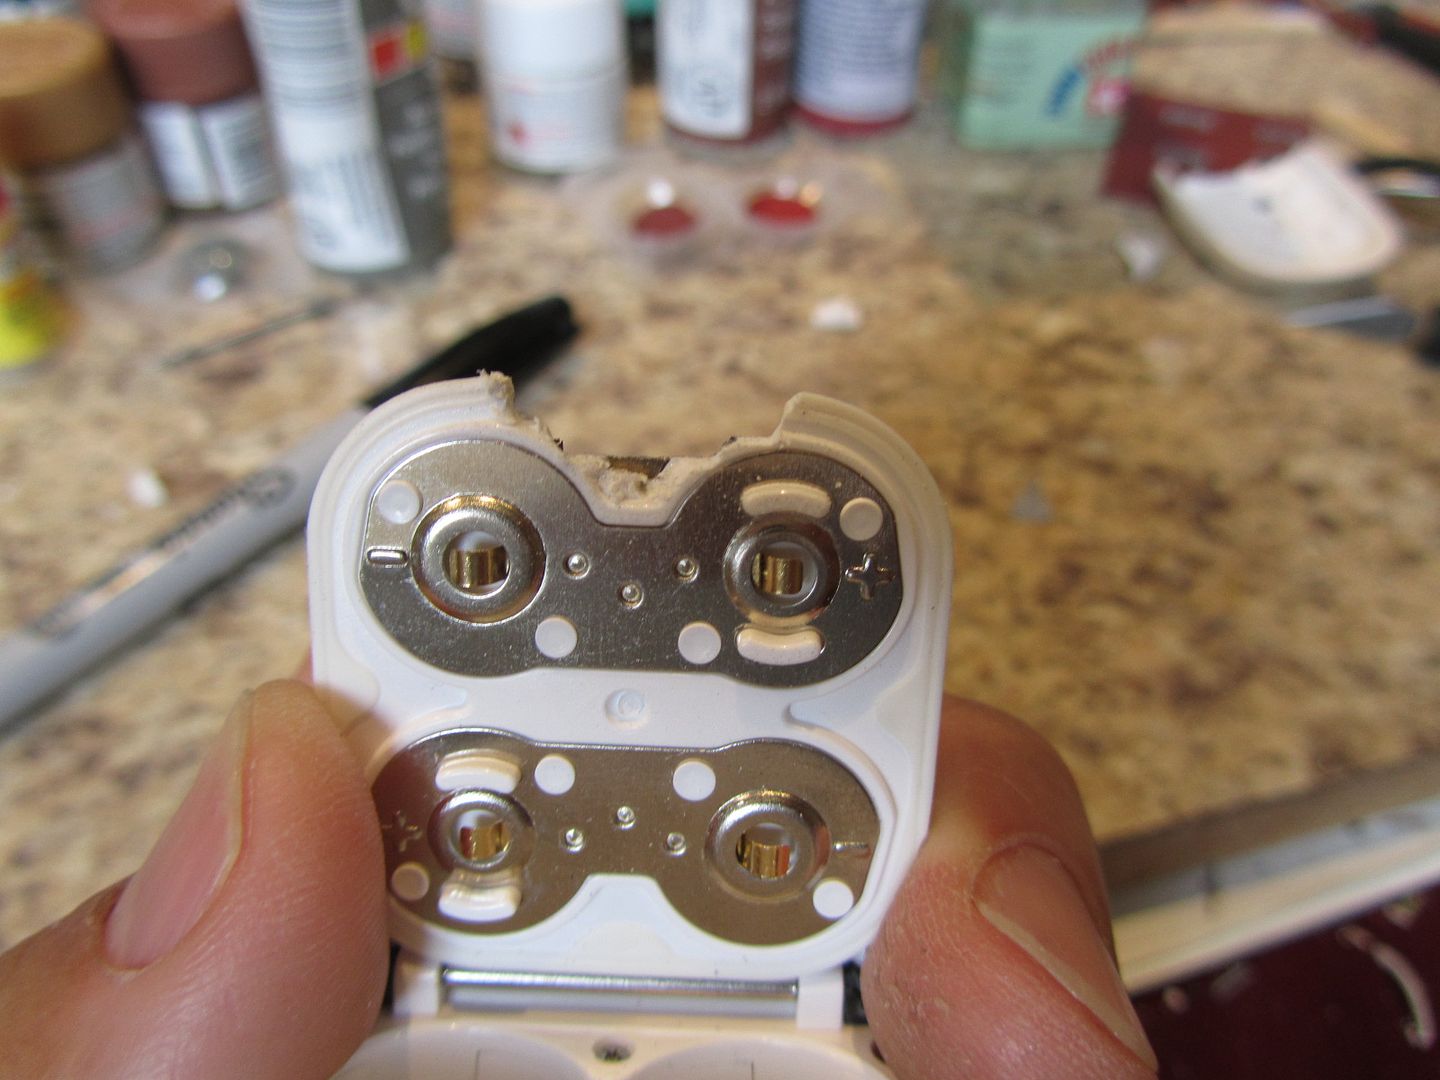
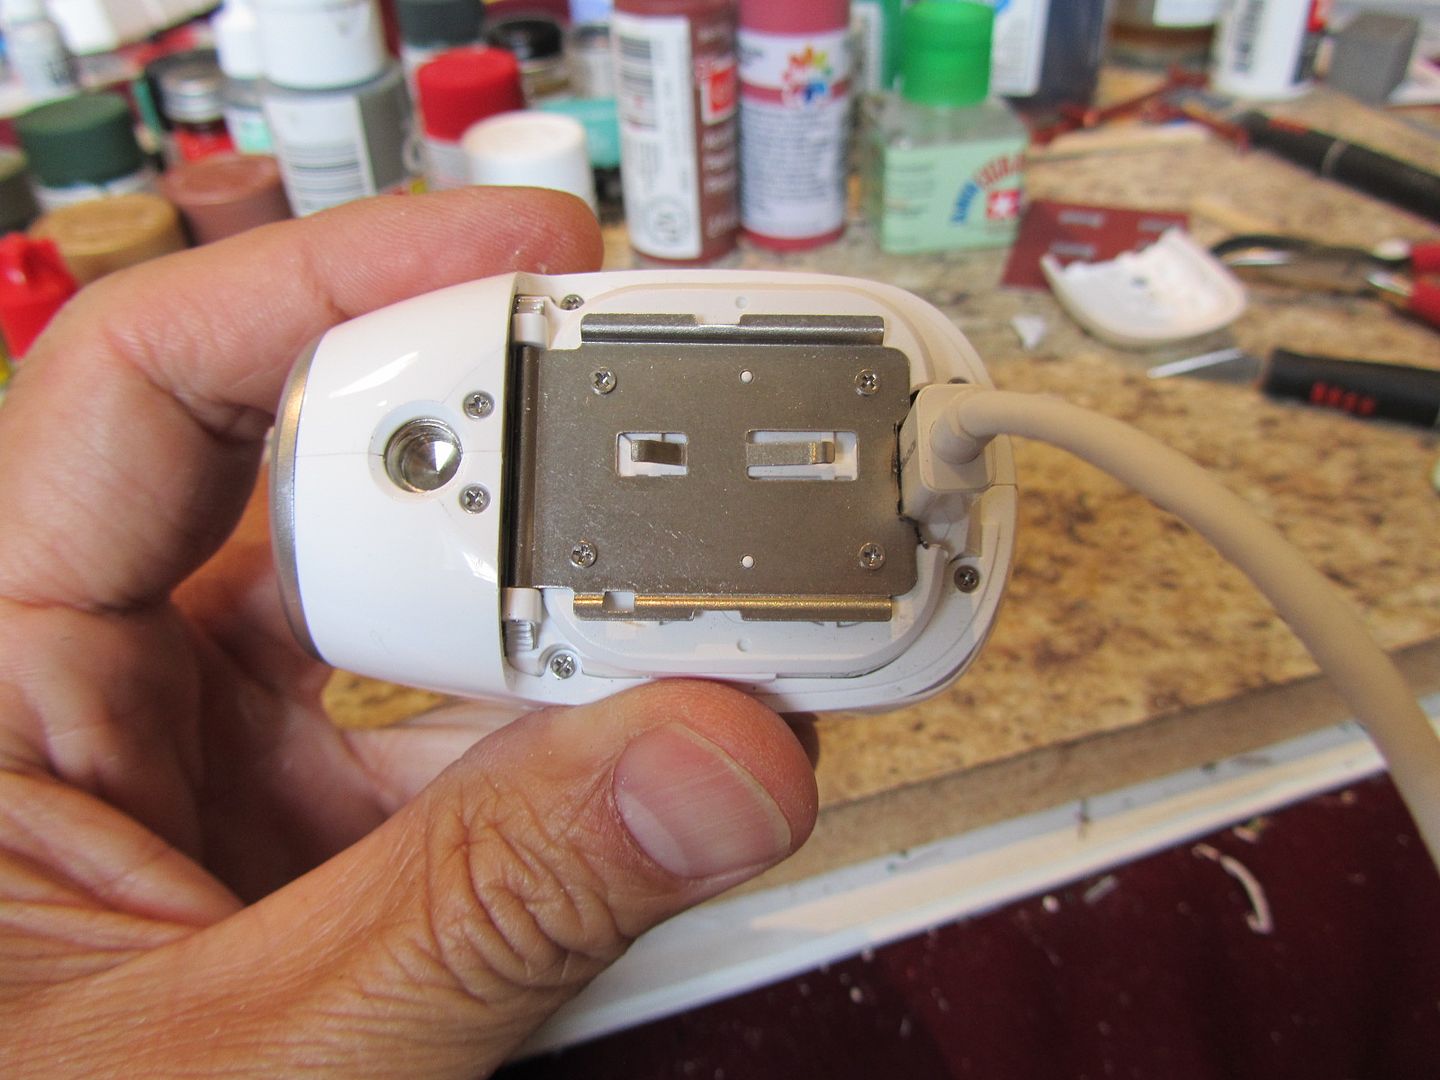
Grind the metal battery door backing plate so the USB cable will fit.
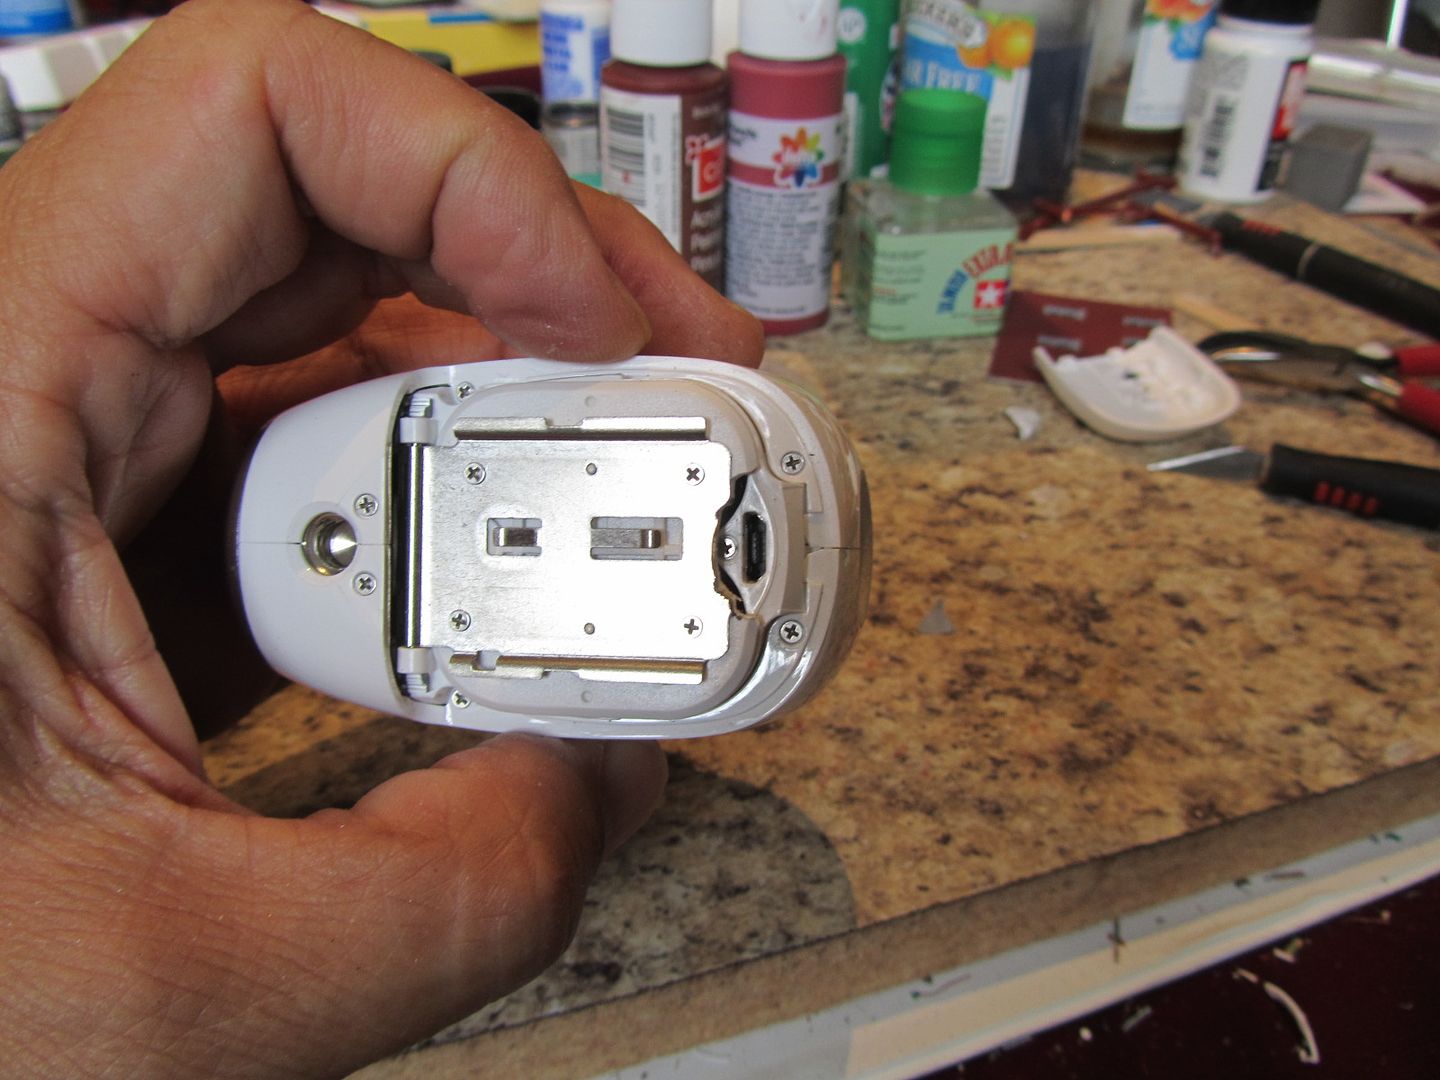
Test fit theUSB cord
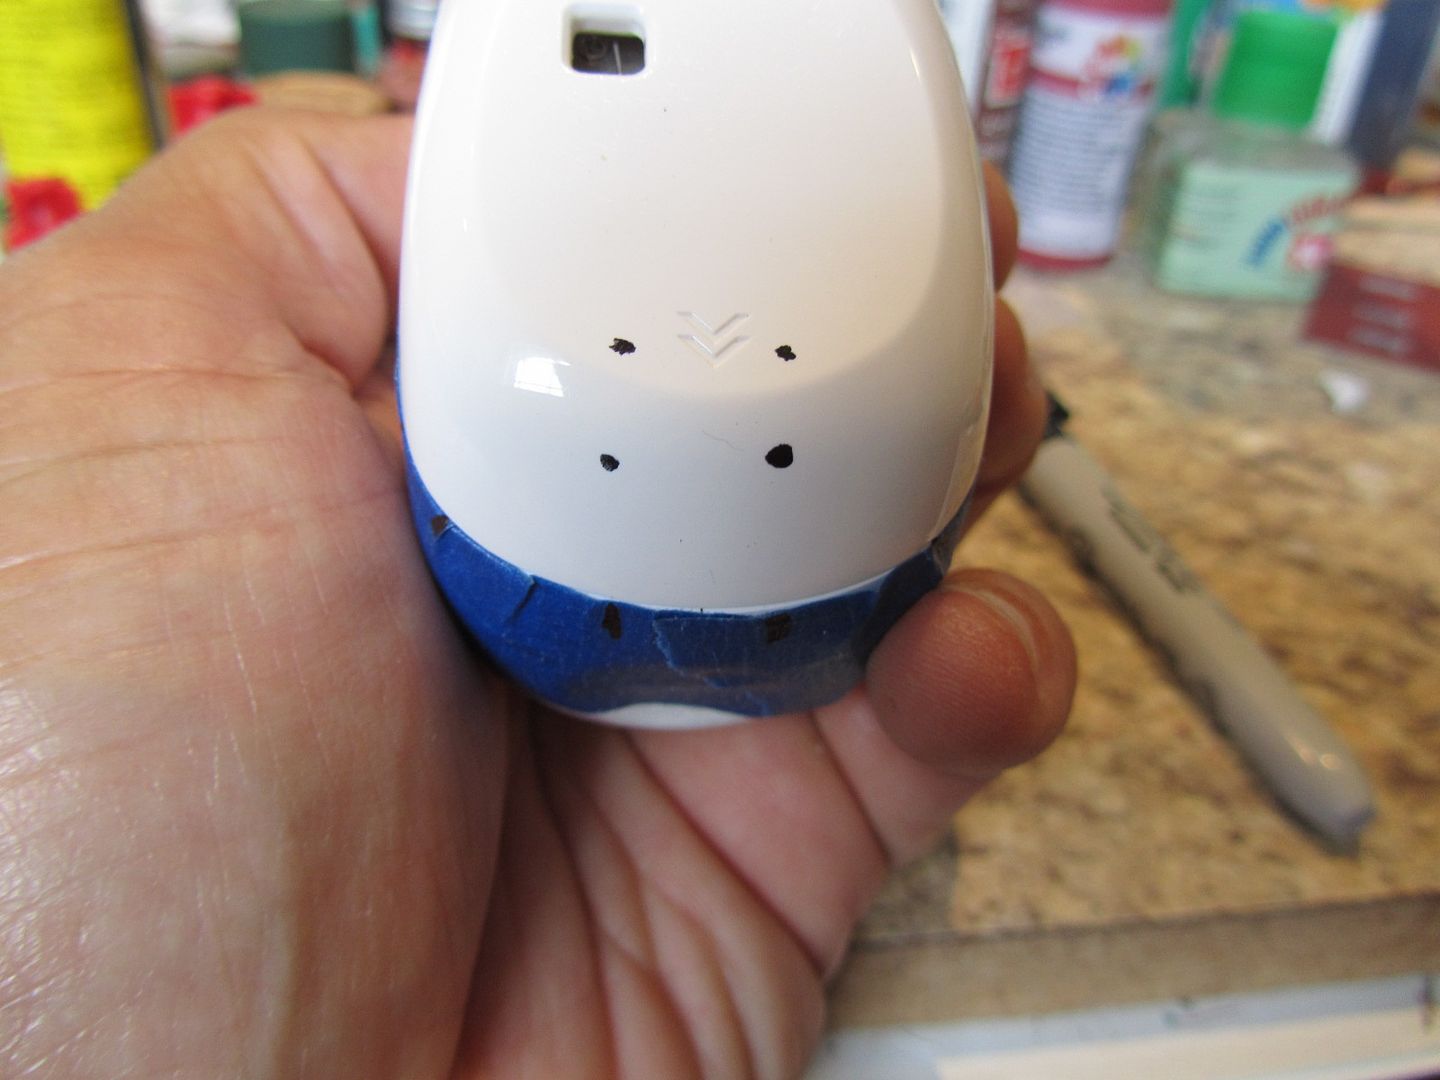
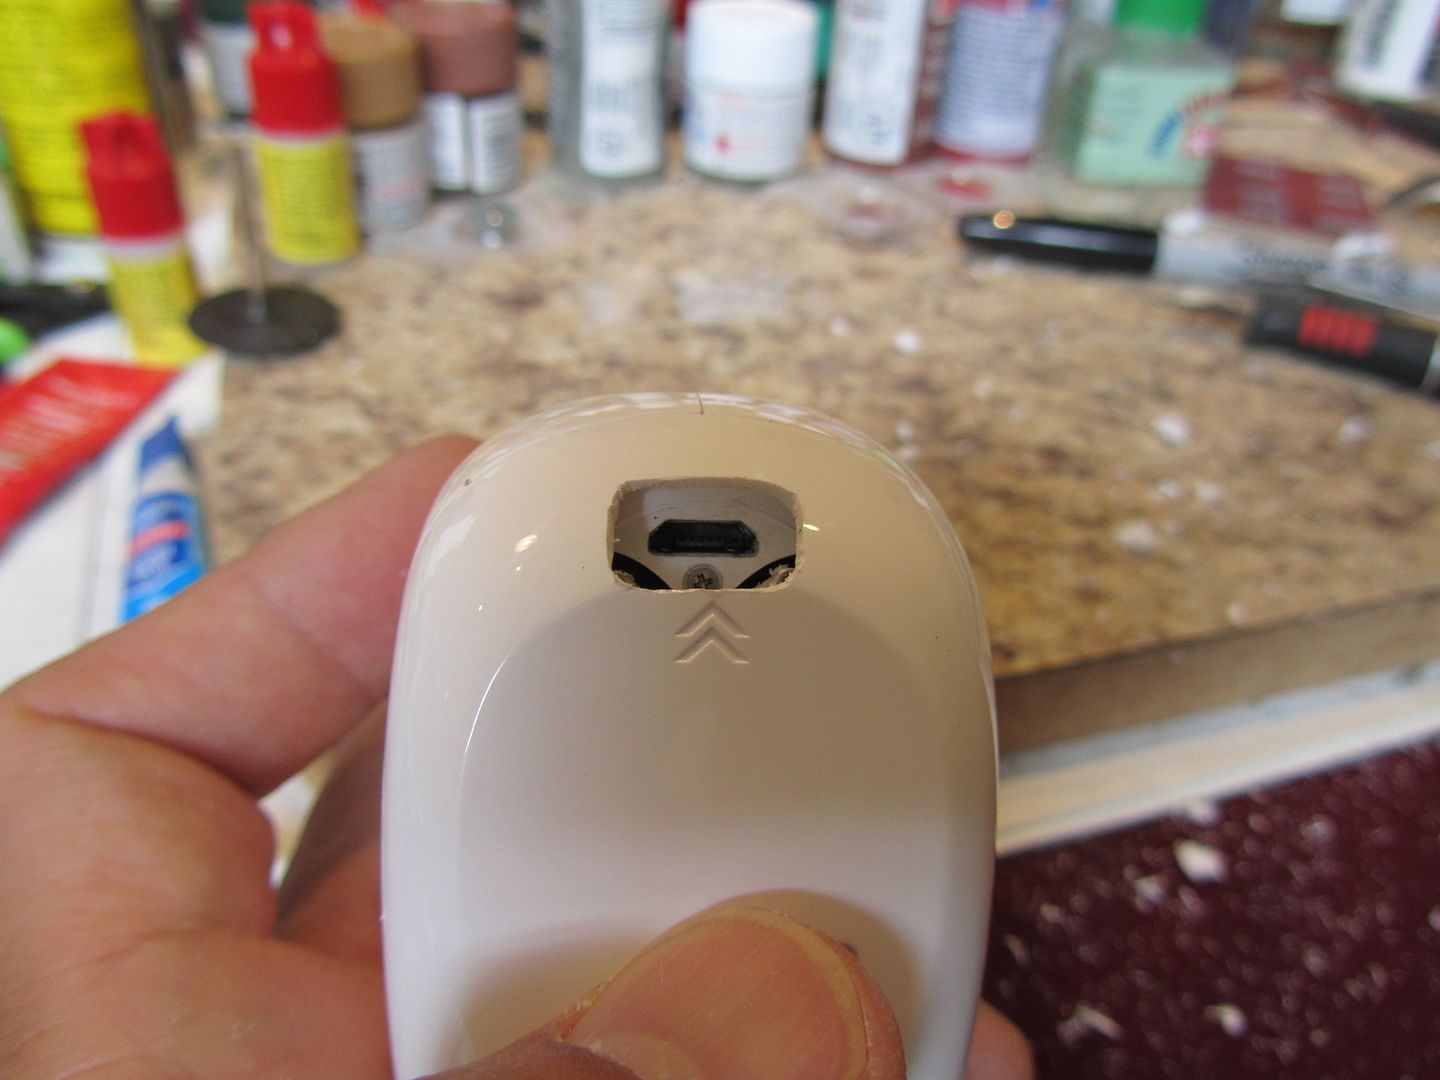
Mark the approximate locations to grind an opening (I will make a template for subsequent cameras to speed up process).
Drill pilot hole
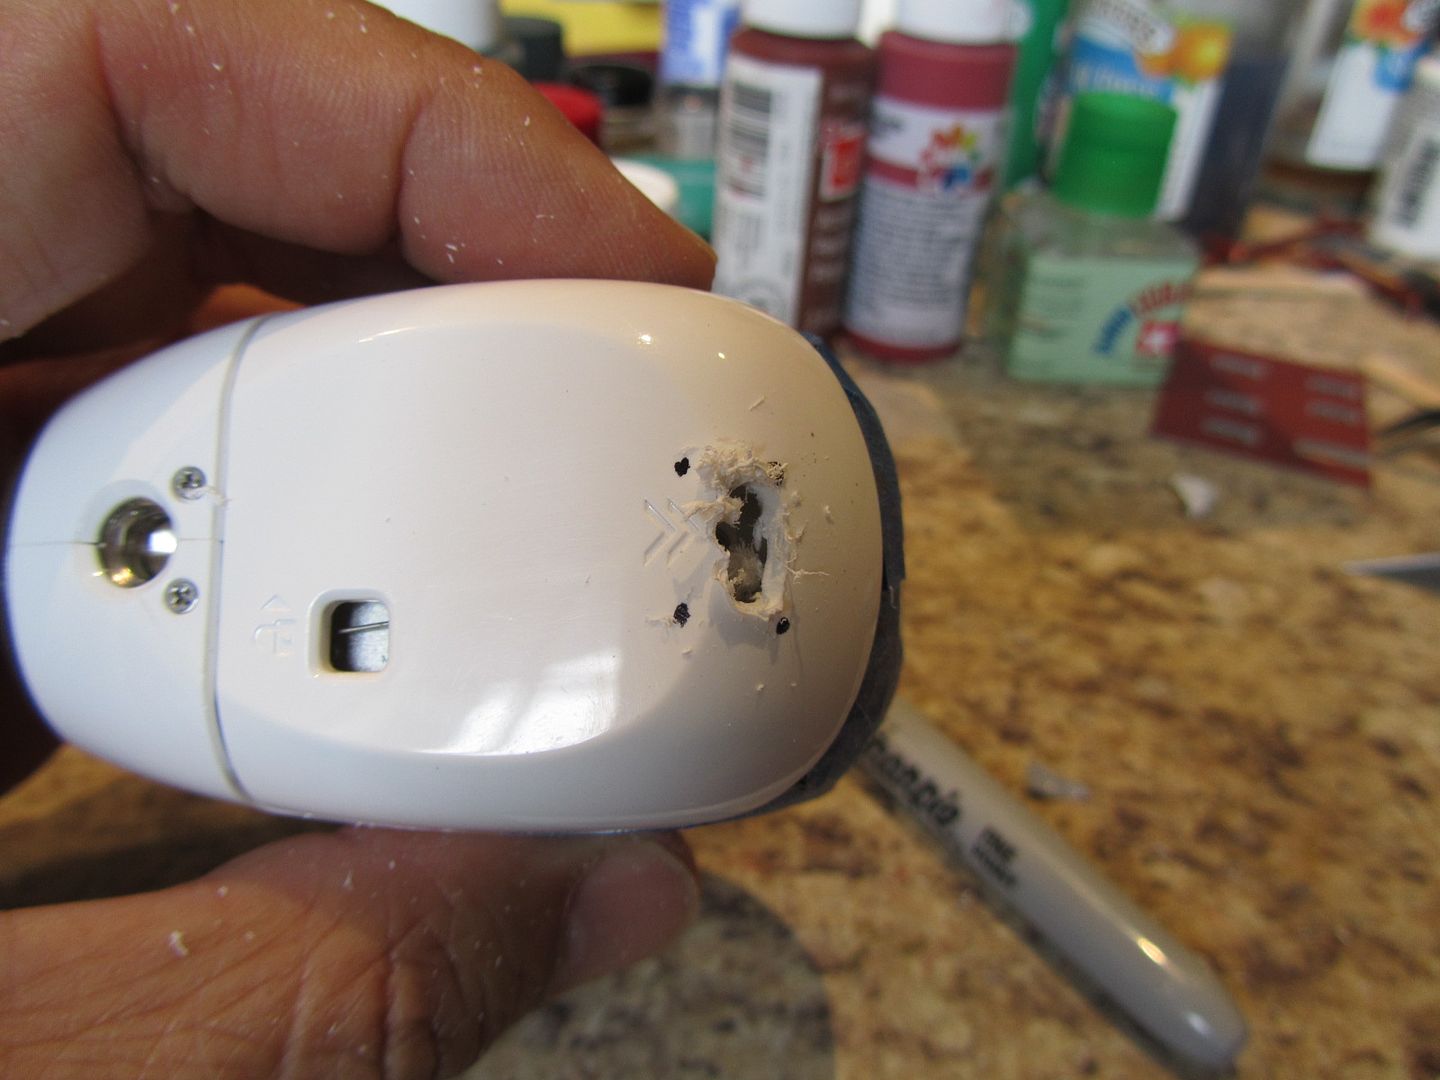
Grind opening and check for fitment of USB cable.
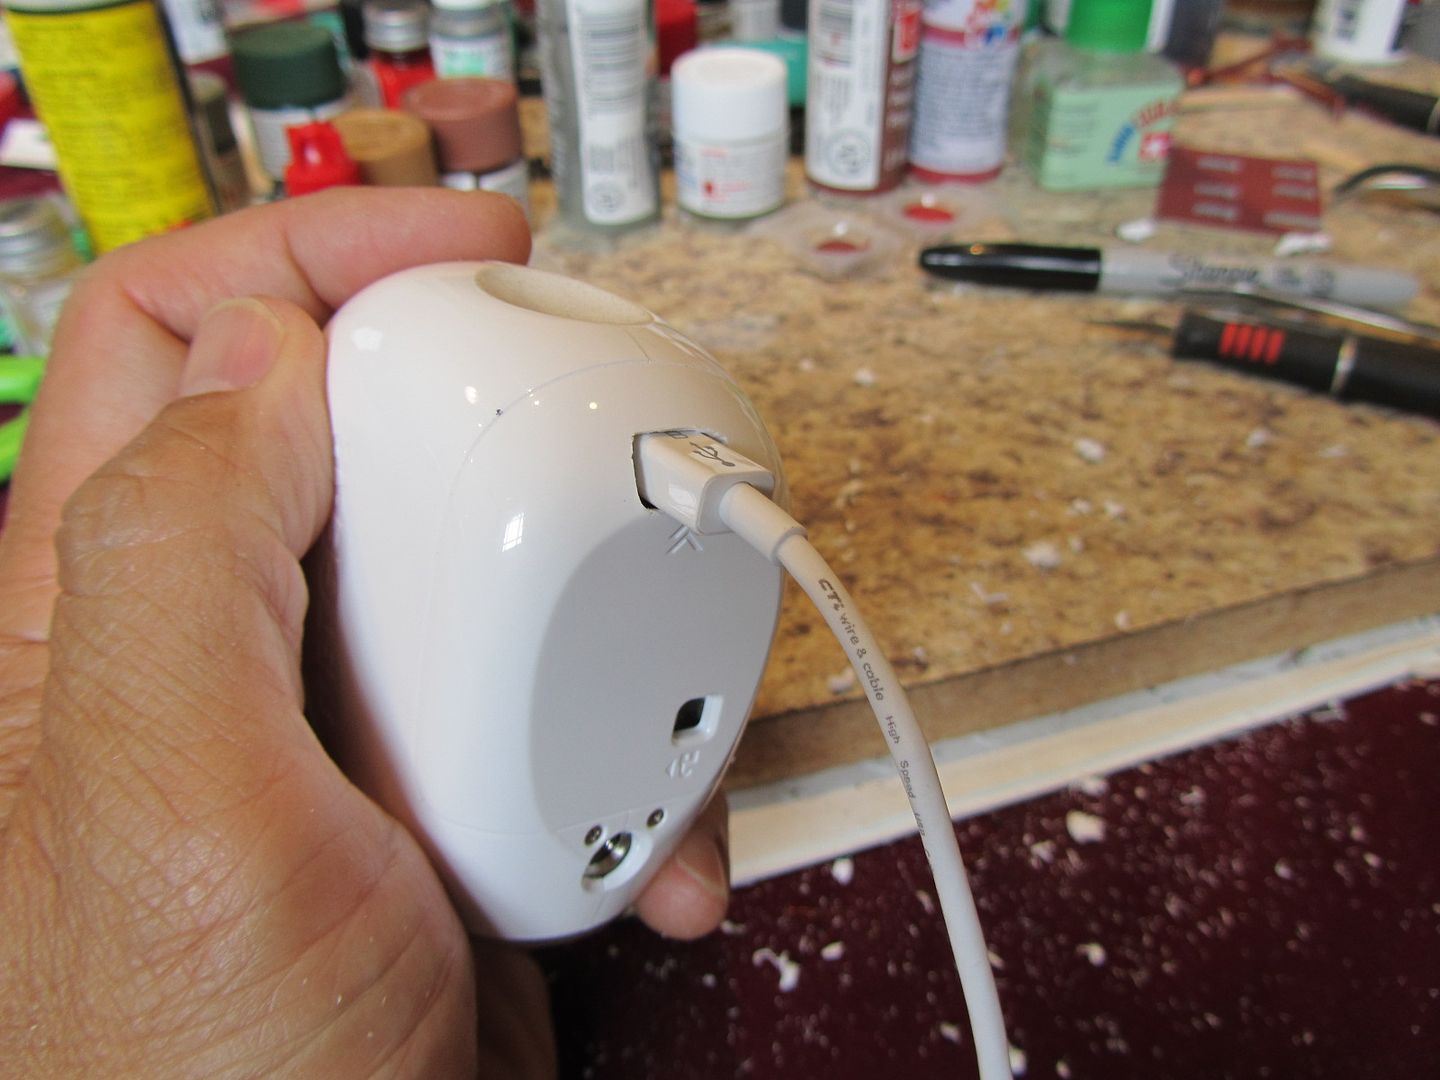
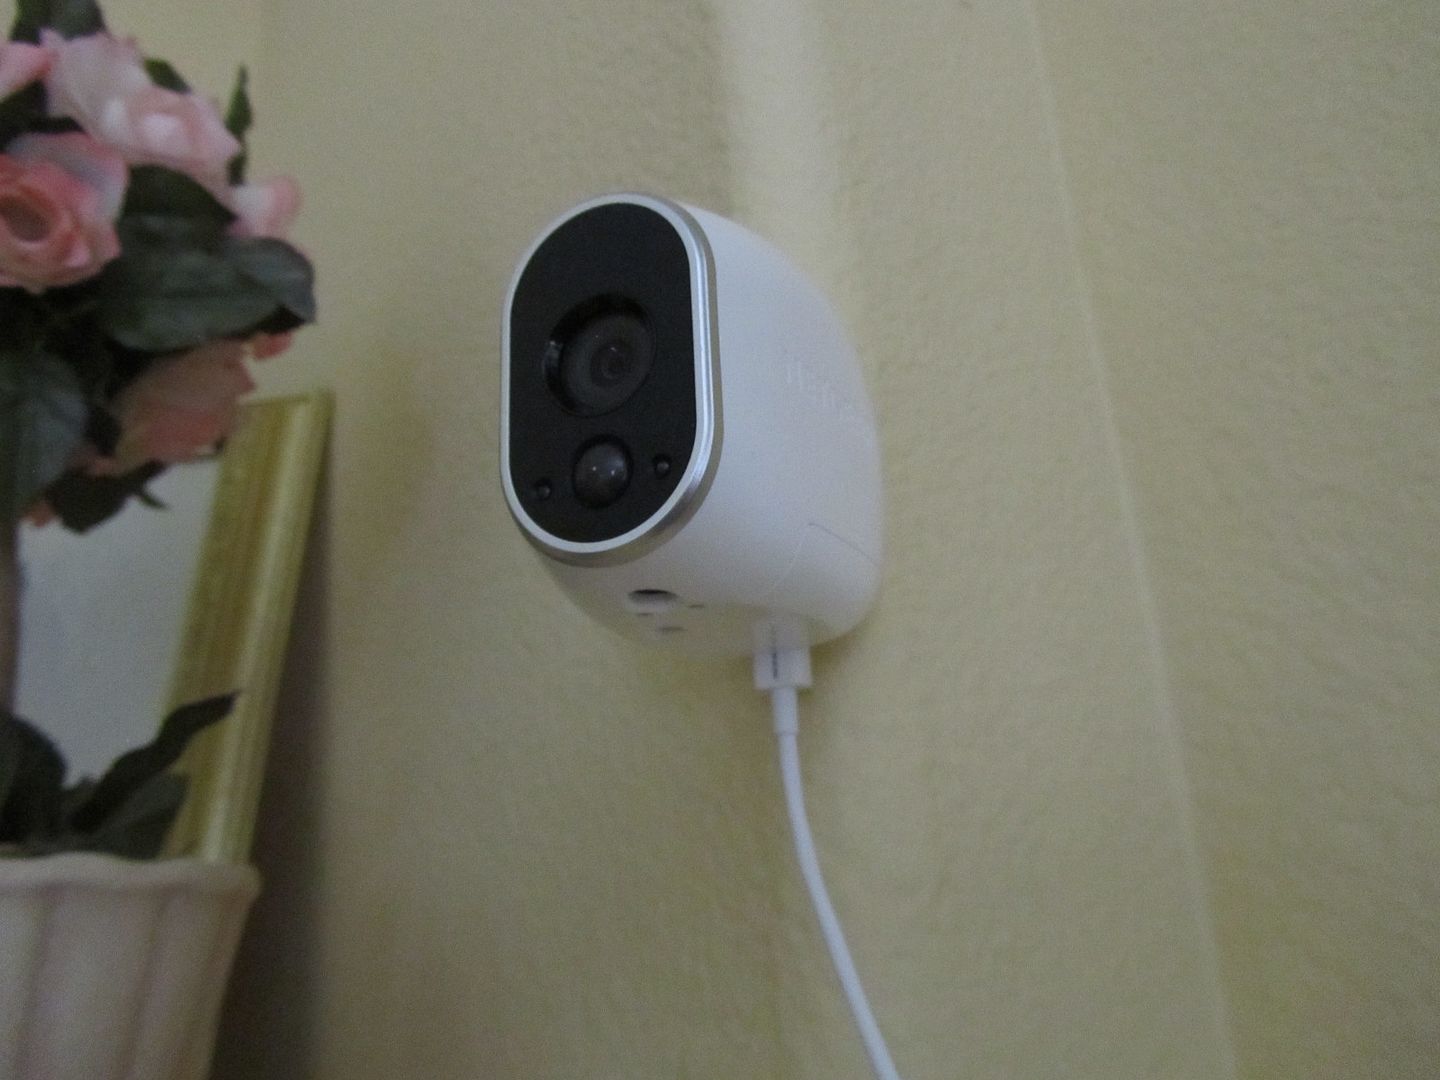
Enjoy (temporary location-will run wires behind drwall).
Good luck!
- Related Labels:
-
Installation
- Mark as New
- Bookmark
- Subscribe
- Mute
- Subscribe to RSS Feed
- Permalink
- Report Inappropriate Content
- Mark as New
- Bookmark
- Subscribe
- Mute
- Subscribe to RSS Feed
- Permalink
- Report Inappropriate Content
Lov2camp wrote:
Since I hard wired the two cameras I'm getting a lot of false notifications? Guess I'm going to get the6v2mha supplies instead. If it's not to late that is.
I know you used 12v dc supply...
but FYI, the units uses 2 sets of cells in parallel. So the voltage needed would be in the 6.4v ( reg cells ) to 8.4v ( rechargeables ).
The unit appears to work at 12v, as per other users, but that may be part of your sense problem.... personnally I'd be running in the <9v range so loss of voltage for power line run isn't a problem.
As a PS... Test the output voltage... Many small wall transformers put out higher voltage than rated ( non regulated ) and will only see the rated voltage near the output spec load.
Morse is faster than texting!
--------------------------------------
- Mark as New
- Bookmark
- Subscribe
- Mute
- Subscribe to RSS Feed
- Permalink
- Report Inappropriate Content
Notifications no longer work with this mod. The new update must have a routine that detects prescence os the USB usage. You can still record live video and camera will work. Just no notifications.
- Mark as New
- Bookmark
- Subscribe
- Mute
- Subscribe to RSS Feed
- Permalink
- Report Inappropriate Content
I have been using the USB port to power my camera with great success since summer 2015 until the new update this year. The new update detects presence of the USB port being used for power and will not send notifications. I noticed I was getting notifications from my battery powered one outside but not from the one inside powered by the USB adapter. When I switched that unit with batteries, the notifications came back. The camera still functions with the USB power, just no notifications.
The camera is mine. If I choose to void the warranty, then that is my business! This is Netgear's way of pushing their expensive Arlo Q.
- Mark as New
- Bookmark
- Subscribe
- Mute
- Subscribe to RSS Feed
- Permalink
- Report Inappropriate Content
Back to the drawing board on an elegant solution by powering through the battery compartment.
- Mark as New
- Bookmark
- Subscribe
- Mute
- Subscribe to RSS Feed
- Permalink
- Report Inappropriate Content
- Mark as New
- Bookmark
- Subscribe
- Mute
- Subscribe to RSS Feed
- Permalink
- Report Inappropriate Content
Sin_City,
While we don't encourage using the wire-free cameras in this way (power over usb) I just tested this and was able to receive notifications (e-mail and push) without issue. Are you seeing this behavior across multiple cameras?
JamesC
- Mark as New
- Bookmark
- Subscribe
- Mute
- Subscribe to RSS Feed
- Permalink
- Report Inappropriate Content
- Mark as New
- Bookmark
- Subscribe
- Mute
- Subscribe to RSS Feed
- Permalink
- Report Inappropriate Content
Or maybe somehow (if possible) wiring the back end of the micro USB port directly to the battery terminals that way the Micro USB port is essentially serving as an adapting port?
- Mark as New
- Bookmark
- Subscribe
- Mute
- Subscribe to RSS Feed
- Permalink
- Report Inappropriate Content
Might be a headache and get a bit messy but I mean at this point I don't see what you'd have to lose as far as tweaking with that arlo goes. Can't imagine it being anymore sophisticated then disembling an iphone and I think we've all been down that route once or twice =p
- Mark as New
- Bookmark
- Subscribe
- Mute
- Subscribe to RSS Feed
- Permalink
- Report Inappropriate Content
- Mark as New
- Bookmark
- Subscribe
- Mute
- Subscribe to RSS Feed
- Permalink
- Report Inappropriate Content
How about just rewiring the micro USB power board manually by swapping out the oem wiring with say your own homemade set. That you know it's still doing drawing power but any other signal routes
If your going to supply an external voltage to the Arlo... rather then bugger the usb ( since the door would be needed to be open ) just drill the battery door and go right to the battery terminal, then silicon up small wire opening.
Not to many here can do sm soldering, while a drilled hole is easy.
Morse is faster than texting!
--------------------------------------
- Mark as New
- Bookmark
- Subscribe
- Mute
- Subscribe to RSS Feed
- Permalink
- Report Inappropriate Content
I'm trying to power the cameras with the USB port, but the live streaming doesn't work and the camera also seems to stop recording after an initial period (30 seconds?). Does the latest firmware block the USB power from working? if so I guess I'll need to solder the power supply to the springs. In case that I need to do that, does anyone know want the voltage should be? (If the batteries are wired in a series it should be 12v) Thanks.
- Mark as New
- Bookmark
- Subscribe
- Mute
- Subscribe to RSS Feed
- Permalink
- Report Inappropriate Content
LGE wrote:I'm trying to power the cameras with the USB port, but the live streaming doesn't work and the camera also seems to stop recording after an initial period (30 seconds?). Does the latest firmware block the USB power from working? if so I guess I'll need to solder the power supply to the springs. In case that I need to do that, does anyone know want the voltage should be? (If the batteries are wired in a series it should be 12v) Thanks.
Careful. Although there are four 3V batteries in the compartment, they are not all in series. I believe they are two in series of two each in parallel, so the supply voltage should be 6V, not 12V.
I believe tihs is all written in this thread. Did you read it thoroughly?
- Mark as New
- Bookmark
- Subscribe
- Mute
- Subscribe to RSS Feed
- Permalink
- Report Inappropriate Content
In another thread I'm reading that it's a 12v system, someone actually posted a picture of him hooking it up with a 12v power supply.
So I used a 12v power supply and hooked it up to the battery terminals, it kind of works. While now it won't turn itself off after maybe 30 seconds, it keeps recording only 10 second clips, when I click stream live it still gets stuck in "please wait".
- Mark as New
- Bookmark
- Subscribe
- Mute
- Subscribe to RSS Feed
- Permalink
- Report Inappropriate Content
LGE wrote:In another thread I'm reading that it's a 12v system, someone actually posted a picture of him hooking it up with a 12v power supply.
So I used a 12v power supply and hooked it up to the battery terminals, it kind of works. While now it won't turn itself off after maybe 30 seconds, it keeps recording only 10 second clips, when I click stream live it still gets stuck in "please wait".
And everything on the internet is true 🙂 Gearhack is just wrong.
Look, it's an easy test. Put in 2 cells in the front or back and the camera works fine but for half as long...
Many DON"T know in the start up, there was a DAY only Arlo cam ( with no IR lights ) that didn't make it to market ... same cam just no IR, running on 2 cells only. The additional cells were to extend the available mahr as the IR draws quite a bit.
Several have used 12v and some work, some don't or have problems. If hooked up right, it should be working the same as on batteries
Here's the reason; As is, the camera runs on 6.4 to 8.4 (li-ion) voltage range.
Curcuit chips have a working voltage range base on the selection of parts plus any variance of the parts themselves. The parts could have been picked with a max working voltage of 12v ( BTW; all educated guesses here from my own builds with surface mount parts)
If so, then with normal variance, some parts will function fine with say 13-14v, some won't
Put in to much voltage and if works it may be funky OR the smoke will come out. If the smoke comes out then unless your good with electronics and have a hot air system for SM parts it's trash.
So if you want to run at 12v , fine... But for long term your better off at about 6v+ with at least 500ma supply. Don't forget the possible losses on long wire runs with dc
As a PS... the USB port is rated at 5v max, after testing I decided it was not the way to go as the chance of burning it out. Tho the cam ran, it was with with low voltage indicated. Not sure if the usb port still works with sw changes
Best is to go to the teminals directly and I've have the best results running from there. Solar with a 6v gell cell worked fine too.
Morse is faster than texting!
--------------------------------------
- Mark as New
- Bookmark
- Subscribe
- Mute
- Subscribe to RSS Feed
- Permalink
- Report Inappropriate Content
--------------------------------------------------------------------------------------------------------------------------------
LGE Wrote:
In another thread I'm reading that it's a 12v system, someone actually posted a picture of him hooking it up with a 12v power supply.
So I used a 12v power supply and hooked it up to the battery terminals, it kind of works. While now it won't turn itself off after maybe 30 seconds, it keeps recording only 10 second clips, when I click stream live it still gets stuck in "please wait".
-------------------------------------------------------------------------------------------------------------------------------
I have to agree with (Schorschi) the the cameras are a 6v system with two batteries in series and each set in Parallel. I did the mod to my camera that sits on my Garage since it is the one with the most traffic and since I travel for work I would hate to be away and have the batteries go out during one of my trips.
I have posted pics of what I did I am not completely done with the mod I am trying to see about getting a flat ribbon cable to do what I am after. I did not want to drill or cut my access door on my camera like others have done here so I went a different route. Let me know if you have any other questions on anything that I posted.
1. Purchased Alligator clips at local hardware store Home Depot, Tyco Electronics SKU# 1001353412, I then soldered on the two positive and the two negative clips together, then I put head shrink around them to protecte them from touching.
2. I then clipped each pair to the camera onto each respective leads, after that I placed the smallest heat shrink I could around both wires. I did this so when the lid closes it does not cut the wires, I am using 26AWG wire in this pic since it is low voltage and is a very short distance, you will see in my next pics.
3. Picture of heat shrink and wires coming from inside the cam out. I will place a small amount of silicone to keep water from entering.
4. I then wired up a larger gauge wire to my camera and covered with heat shrink on each wire then place a larger heat shrink over those for protection.
5 I am using the Arlo Camera arm mount for this camera not the Magnetic one so I drilled a whole in the arm since it is hollow this way I can run my wires through it. I then placed silicone on the hole.
Picture of wires running through arm.
6. I then pulled the wires through my wall mounted the arm and powered my camera with an old 7.5vdc 1.0a power supply I had laying around. The camera powered up synced up and is working perfectly fine.
Image from camera in live view.
Hope this help someone out there that wants to convert there camera over to a powered system.
- Mark as New
- Bookmark
- Subscribe
- Mute
- Subscribe to RSS Feed
- Permalink
- Report Inappropriate Content
If you can find some old ribbon cable from a computer ( like for the drives ) or even some of the newer ribbons (copper trace on/in clear plastic) it woul fit easier.
I ran the camera off of 30g wire I had and for couple inches it was fine ( to heavier outside )
Nice job
Morse is faster than texting!
--------------------------------------
- Mark as New
- Bookmark
- Subscribe
- Mute
- Subscribe to RSS Feed
- Permalink
- Report Inappropriate Content
That is a good idea, I have a few old PC's laying around I just might look at that this weekend. I'm just enjoying the fact that I can let the camera do its job without the stress of battery loss or missed replacements.
I am an IT Administrator at a Controls company we deal with cameras and high end building automation equipment and I have to say I am really liking this system. What I have found in the past is that no matter what the product it always seems like the software always has issues. I had tried a Lorex wireless system and just did not enjoy the interface and a few other issues. I really have to give it to Netgear for coming out with such a simple product. Once they get some type of power adapter option I think this product will be rock solid.
I am working on a battery pack made of false or fake battery's where they will fit the housing but where I can have the terminals as part of it so it's a matter of plug and play. I will post pictures once I get it all figured out and built.
- Mark as New
- Bookmark
- Subscribe
- Mute
- Subscribe to RSS Feed
- Permalink
- Report Inappropriate Content
Thought of dummy batteries, easy enough to make and have in past....But it was easier to tack solder on to the terminals.
If I was doing a permanent replacement not caring about going back, I'd just drill a small hole and add a female coaxial pig tail hanging out a few inches ( so cam can be moved if needed ). Coxial Seal for the coaxial joint for water proofing
BTW, for those areas without nearby power... http://www.walmart.com/ip/Moultrie-6V-Deluxe-Solar-Panel/16386214
solar and their 6v battery combo for $30 designed for a game feeder
( as a PS, connect to both sets of terminals as some have reported variance in battery indicator if only front or rear set used... the cell banks are basically in parallel but there is a small bit of circuitry between the two )
Morse is faster than texting!
--------------------------------------
- Mark as New
- Bookmark
- Subscribe
- Mute
- Subscribe to RSS Feed
- Permalink
- Report Inappropriate Content
TomMac,
I like that, so it seems that with a little bit of parts such as a couple of Diodes you can make a system that will always have power using the panel during the day and some rechargables at night. then having them recharge during the day once again, I am going to look into this since I have one camera that I would like to put over by my shed area I got good connectivity out there just no power. If I build something and it works I will pass along my findings and pics on what I did.
thanks for that bit of info never crossed my mind.
- Mark as New
- Bookmark
- Subscribe
- Mute
- Subscribe to RSS Feed
- Permalink
- Report Inappropriate Content
iapodaca73 wrote:I like that, so it seems that with a little bit of parts such as a couple of Diodes you can make a system that will always have power using the panel during the day and some rechargables at night. then having them recharge during the day once again, I am going to look into this since I have one camera that I would like to put over by my shed area I got good connectivity out there just no power. If I build something and it works I will pass along my findings and pics on what I did.
.. the Moultrie 6V Deluxe Solar Panel seems to have controler in it as it's designed to match their battery.... it states no overcharging of battery in spec. Cost for both not much more than 4 quality li-ion cells. As a plus the battery is 5000mahr compared to 3000 as stock.
I ran one of my units for a while on a 6 v gel cell and solar panel ( but had a controller as the panel put out 18-20v in full sun as normal )
But there many parts out there and a zener diode or 317 voltage chip couldn't hurt if needed when putting together you own..... its not rocket science ! 🙂
Morse is faster than texting!
--------------------------------------
- Mark as New
- Bookmark
- Subscribe
- Mute
- Subscribe to RSS Feed
- Permalink
- Report Inappropriate Content
TomMac,
well ill haven't done the solar project yet out by the shed, but I did update the wiring to the cam I posted before. I took an old ribbon cable like you mentioned and it worked like a champ still using alligator clips. Thanks for that add, it was a good one.
- Mark as New
- Bookmark
- Subscribe
- Mute
- Subscribe to RSS Feed
- Permalink
- Report Inappropriate Content
I made these dummy battery
through this eBay DC-DC converter ( http://www.ebay.com/itm/222031140251?_trksid=p2057872.m2749.l2649&ssPageName=STRK%3AMEBIDX%3AIT )
So to my 12 volt power source comes out as 6.4 volts
- Mark as New
- Bookmark
- Subscribe
- Mute
- Subscribe to RSS Feed
- Permalink
- Report Inappropriate Content
Andmatts wrote:I made these dummy battery
through this eBay DC-DC converter ( http://www.ebay.com/itm/222031140251?_trksid=p2057872.m2749.l2649&ssPageName=STRK%3AMEBIDX%3AIT )
So to my 12 volt power source comes out as 6.4 volts
That's a nice little cheap converter... buck type transformer looks like to up voltage if needed too?
Prob cost me more to in single parts to build a small controler
But the output at 6.4 is a good voltage to work with as the OEMs put out 6.4 as new.
Can't really seeing it pulling more than 250ma at max draw.... Nice job ( tho can't see the pics yet.)
Morse is faster than texting!
--------------------------------------
-
Accessories
4 -
Activity Zones
1 -
Amazon Alexa
1 -
Apple HomeKit
2 -
Apple TV App
9 -
Applications mobile et en ligne
1 -
Apps
4 -
Arlo Go
3 -
Arlo Mobile App
699 -
Arlo Pro
36 -
Arlo Pro 2
1 -
Arlo Q (Plus)
3 -
Arlo Smart
191 -
Arlo Web and Mobile Apps
18 -
Arlo Wire-Free
30 -
base station
1 -
Batteries
529 -
Before You Buy
897 -
Can't view cameras live at all
1 -
Dépannage
1 -
Détection de mouvements
1 -
Features
1,044 -
Fehlerbehebung
1 -
Firmware Release Notes
93 -
Google Assistant
1 -
Hardware
1 -
home security
1 -
IFTTT (If This Then That)
105 -
Installation
2,031 -
Iphone 14 pro
1 -
Live view
1 -
Modes and Rules
1 -
Motion Detection
2 -
Object Recognition
3 -
Online and Mobile Apps
983 -
Online und mobile Apps
1 -
Order Not Going Through... help please!
1 -
Other Discussions
1 -
Partner Integrations
4 -
Security
1 -
Service and Storage
14 -
Smart Subscription
3 -
SmartThings
71 -
Troubleshooting
9,004 -
Videos
233 -
Vidéo
2 -
Warranty & Contracts
2
- « Previous
- Next »


