This topic has been closed to new posts due to inactivity. We hope you'll join the conversation by posting to an open topic or starting a new one.
Mounting Cameras To Brick
- Subscribe to RSS Feed
- Mark Topic as New
- Mark Topic as Read
- Float this Topic for Current User
- Bookmark
- Subscribe
- Printer Friendly Page
- Mark as New
- Bookmark
- Subscribe
- Mute
- Subscribe to RSS Feed
- Permalink
- Report Inappropriate Content

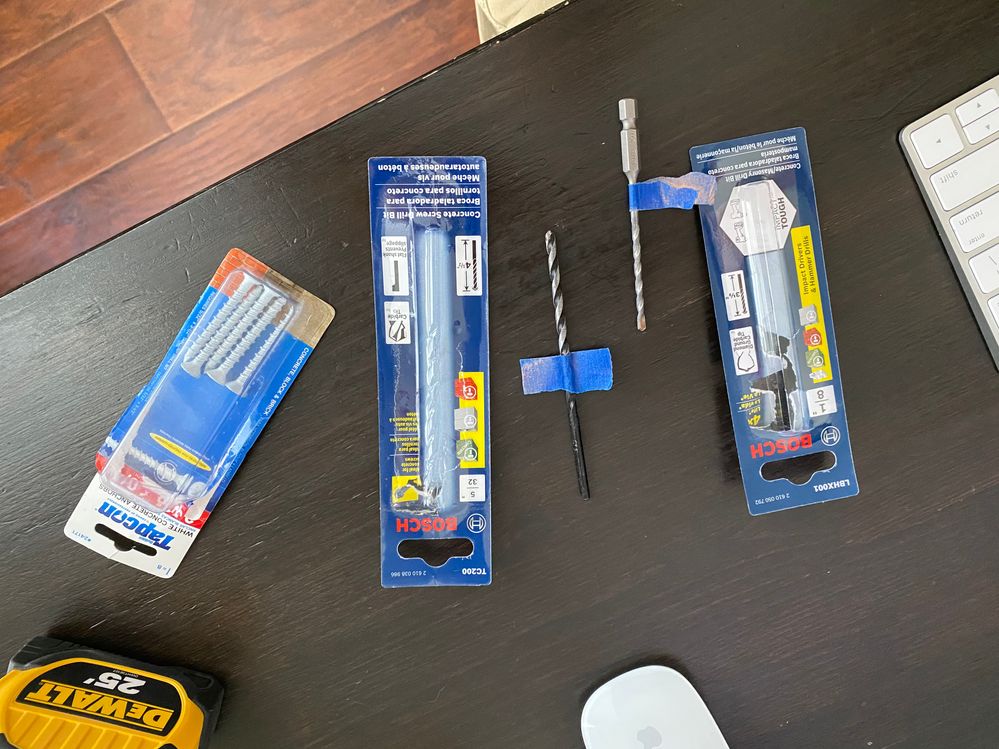
Tapcon recommends drilling your holes a little bit deeper than the length of the screws, so I drilled 2" pilot holes with the 1/8" drill bit (after using the mount & a sharpie to mark the location of the holes). I used a tape measure to measure 2" back from the tip of the drill bit, and placed a piece of blue painter's tape on the bit so I knew when / where to stop. Start slow when starting your holes! The drill will shift / walk on you on a brick surface! Might not be a bad idea to use a punch to mark / start your holes (now that I think about it); I had to drill 2 sets of holes because my first set was off a good bit & I didn't want to risk driving the screws only for it not to work. My second set was even off a little, but it wasn't off enough that I couldn't successfully drive the screws. Hopefully, the structural integrity isn't affected. I followed up with the 5/32" bit, and then I drove my screws through the mount / into the brick. Easy, peasy!
Oh yeah, I used a hammer drill! Again, be sure to start slow!! I believe that's all there was to it... With the right tools & equipment, it's a pretty simple job. My only concern at this time is the signal through the brick. I've had to move my SmartHub around a bit in order for it to pick-up this camera (along with all the others at the same time). And now my kids are complaining about their signals because I had to move / tap into mesh network towers around the house. I'm still tinkering with it to make everyone happy, in addition to having good camera coverage. Hope this helps anyone looking to mount their cameras into brick!
- Related Labels:
-
Installation
- Mark as New
- Bookmark
- Subscribe
- Mute
- Subscribe to RSS Feed
- Permalink
- Report Inappropriate Content
Thx for sharing this - I think many folks will find it helpful.
- Mark as New
- Bookmark
- Subscribe
- Mute
- Subscribe to RSS Feed
- Permalink
- Report Inappropriate Content
-
Accessing Local Storage
1 -
Arlo Mobile App
278 -
Arlo Pro 3
1 -
Arlo Smart
179 -
Arlo Ultra
9 -
Before You Buy
432 -
Features
287 -
Fehlerbehebung
1 -
Firmware Release Notes
39 -
Installation
300 -
Online and Mobile Apps
113 -
Service and Storage
110 -
Smart Subscription
3 -
Troubleshooting
1,817

